
Steve did research on the Wood Flooring Association's website. He learned a number of things about how the job should be done. He also learned that many floors can be screened rather than sanded as long as they aren't heavily damaged. Every floor has about 3-4 sandings in it's lifetime, so it's worth it to sand conservatively and maintain your floors finish so they don't have to be re-sanded too often.
Here is what we ended up doing:
We rented U-Sand machine and an edger from our local hardware store. The U-Sand has 4 orbital disks on it and we started with approximately 20 grit and gradually went up to about 120. The benefit of the U-Sand as opposed to the drum sander is that it stays level-
you CANNOT gouge your floor with it-period.
The edger was another story, the thing kind of had a life of it's own -a powerful little machine and we had to be careful and most important: keep it level to avoid scrapes or gouges. Our floor had stain on it and we had no issues with burning as was mentioned in some comments on Making a House a Home's blog.
The floors came out pretty darn good I have to say. The only thing is we could have sanded it for longer to even out a few waves in the floor and we ended up with a few scrapes but they are not noticeable.
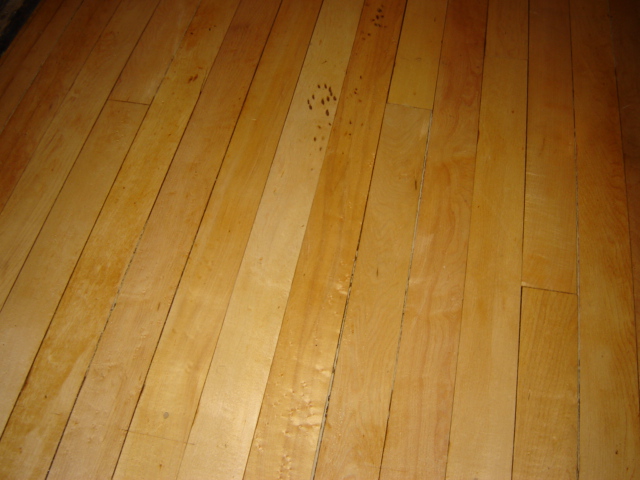
Here's the finished floor

One thing to note about this task is that you will have to fill all the cracks between the boards and holes with wood putty orsomething similar. Otherwise dirt will collect there. One thing I'd do differently next time is use maple wood filler for filling the cracks. We used wood putty and the match isn't as nice as it could be.
Here's a close up shot
Another thing to consider is the kind of finish you use. Most refinishers use water based finishes nowadays, which are much less toxic but not as strong as the old stuff. We used an industrial grade water based finish that we purchased from Woodworker's Supply. It was around $50.00 per gallon and we used 2 Gallons.
A Long View

To give you a time frame, it took us about 13 hours to fill the cracks and sand clean a 10' x 11' room- it was a long day. We had no idea it would take that long. It cost us about $400 between the tool rentals and sandpaper(we used alot of course) but that was less than the $1200 that we were quoted for that room alone.
We are planning to test out our floor refinishing skills on the den in the Fall if we gut the room as planned. I just thought I'd share our experience and hopefully it helps someone else out!
14 comments:
WOW! You are going to gut another room? Oh my!!!! I'm speechless.
Thanks for the info. I just ordered my flooring today and I plan on sanding a finishing myself for the same reasons you did. I'm not sure anyone has one of the U Sand machines around here. I saw on of those on a home improvement show and called around to see if any of the rental places had one. They hadn't even heard of them yet! Ah, small town living.
well, there are some real nice things about small town living too! I bet no one parks in front of your house at 6am blasting mexican music for example- Ah the sounds of summer :)
Yes- Jen- we'll see - we are pondering it. It's the final frontier in this floor- the den.
We bought a used drum sander from a rental place for $650. We had too many floors to sand so buying was cheaper than renting and I could work at my own pace. Of course it pays not to be living in the place yet but two mortgages are a real pain. Paper is about $2 a sheet or less ordered in packs of 10 online. I used my DeWalt sander/grinder for edging. Paper discs were made from the used drum sand paper. Our floors have wide boards so gaps between boards were left pretty much alone. Some really wide gaps were filled with fine sawdust (from sanding) mixed with linseed oil though (you can also mix it with polyurethane or white glue) but it will stain darker than the floors whatever you do.
Your floor looks awesome! It's nice to hear about someone using the u-sand. I 've read about it, but I've never heard any testimonials. We have about 800sf of fir floors to sand, fir is a little soft, so I'd like to use something a little more gentle. I was thinking of starting with a 60 grit, since it's softer wood. I think our floors are shellaced, I spilt some denatured alcohol on them, and it left a stain.
Your floors look great! Thanks for sharing your experience. I can't wait until we're at the flooring stage!
Adding another comment about the u-sand (for derek). The thing is great. They (cherryhill mfg.) are even coming out with a model for stairs - cant wait for that. We did our main floor living, dining, sun room, and library as well as the MBR as soon as we got in our 1921 place. The floors were so bad and we did not know what else to do with the floor :-) It does take a while (and alot of the course grit) but it is well worth it and way cheeper than someone else.
So I have used the u-sand on heart pine and oak so far. I haven't even started on the fir (3rd floor). But so far so good.
kevinfoote
Your floors look beautiful. We need to do our living and dining room, but we'll have to be out of the house for the process. There's no way to get anywhere in the house without going through them. How long did it take for the finish to dry and how many coats did you need?
Thank you! I think we did 3 coats and they dried very fast- in hours. We stayed off them for a few days though for them to cure. We used a water-based finish, which is not toxic and dries faster but it is not as strong as the old school swedish finish- but that is not a finish you can be in the house while it's done- very toxic!
Thanks for the great information!!! Where did you rent the USand in Chicago? We are going to start our floors in the next two week.
Thanks again.
LC
Clark Devon Hardware!
I watched the u-sand videos and it mentions that you don't need to use a edger. Is that true? Did you take off your trim? I have a quarter round on my trim, so would I have to remove that?
Thanks,
Paul
We needed an edger. Unless they have improved the design since we used the machine, the sanding discs did not reach the edge of the floor and we had to hand edge the room. Good luck!
Nice thread guys. We'll try to throw this a reference in our wood stair refinishing section later this week.
Wood stair refinishing
Post a Comment