Monday, July 31, 2006

Antiques Roadshow recap


We're rich! rich! rich! rich! (not really)

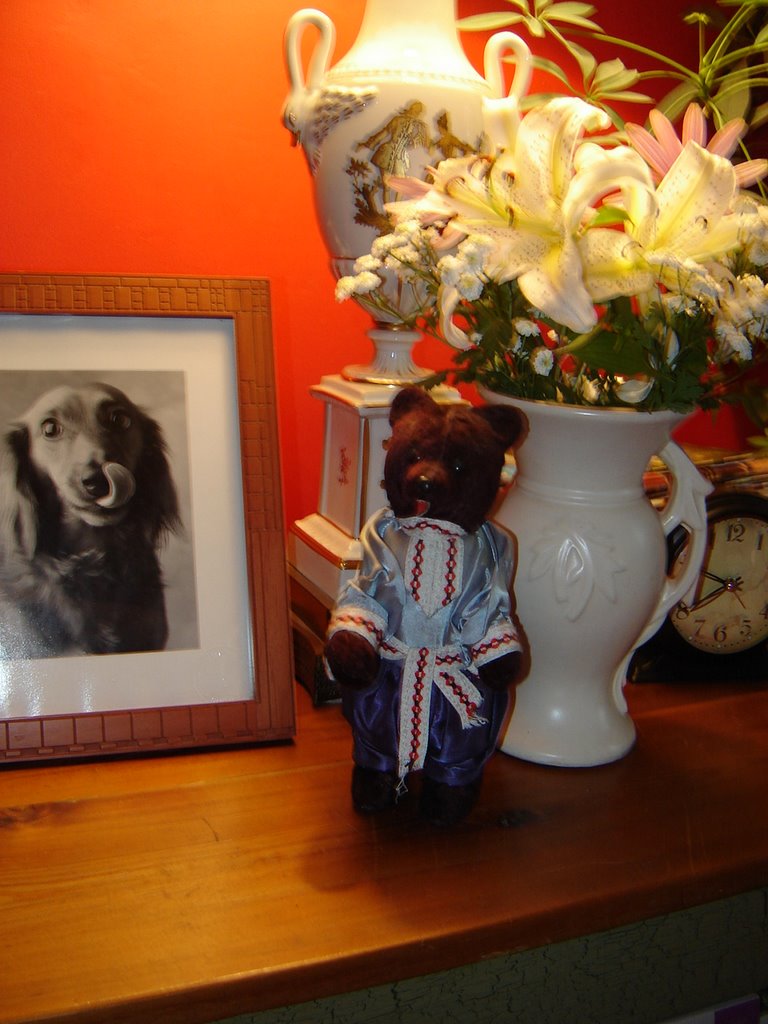
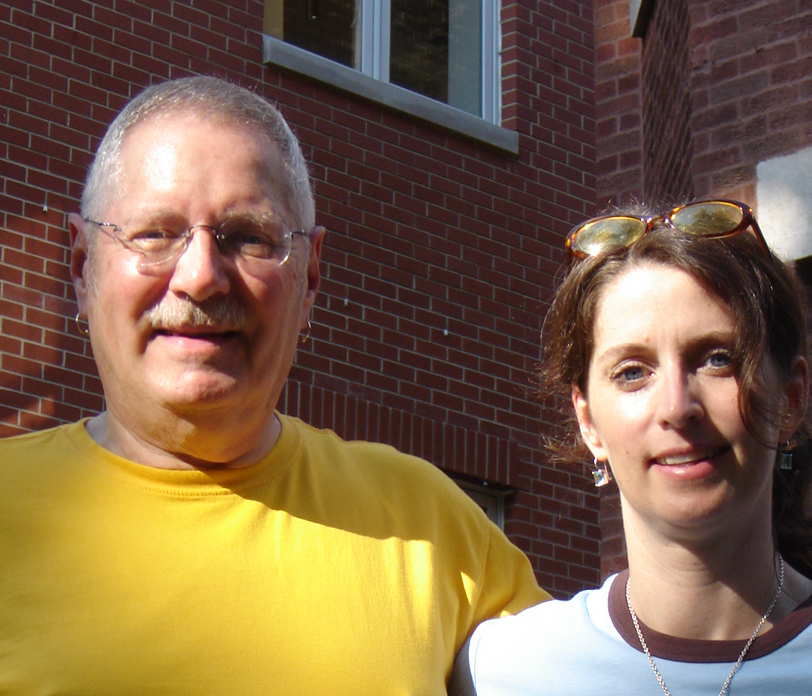
Dad and I headed out for Milwaukee with optimism, a dancing bear, my grandmother's baby doll, and some porcelin on Saturday.

We returned satisfied, but not blown away. No offense to the show producers, but watching the TV show is more exciting than standing in line for 2 hours and then not being able to watch any of the taping of the show or even stand and watch some appraisals.

I also found it humorous that when you watch them do the appraisals on TV, the appraisers seem so very attentive and enthusiastic and smile often. In person, they were much more blase and non-chalant. I know they see alot of people in one day, but all of us people waited in lines for hours and could use a smile.

Now, I know we didn't have the world's most exciting objects perhaps, but it just struck me as funny the difference from the TV show. Like, I guess they only get excited for the cameras???

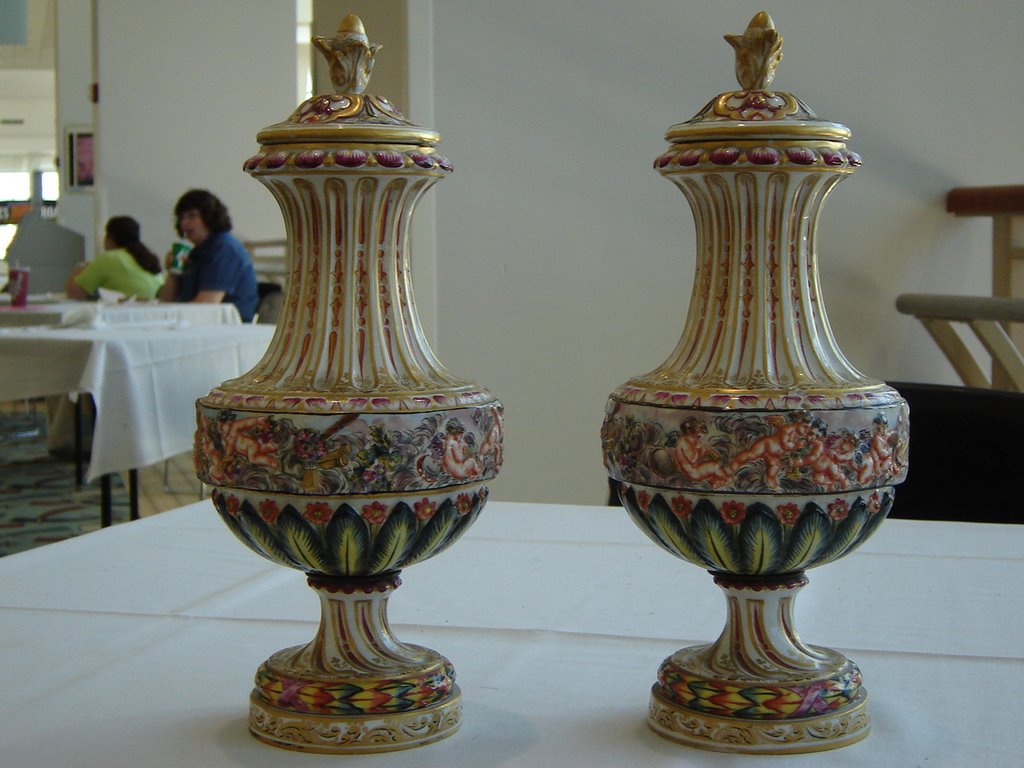
The urns at left were early 20th century, hand painted and made in France, valued at $600-$800.

My grandmother's doll was made in about 1905 and was made by a German company JD Kestner, valued at $500.

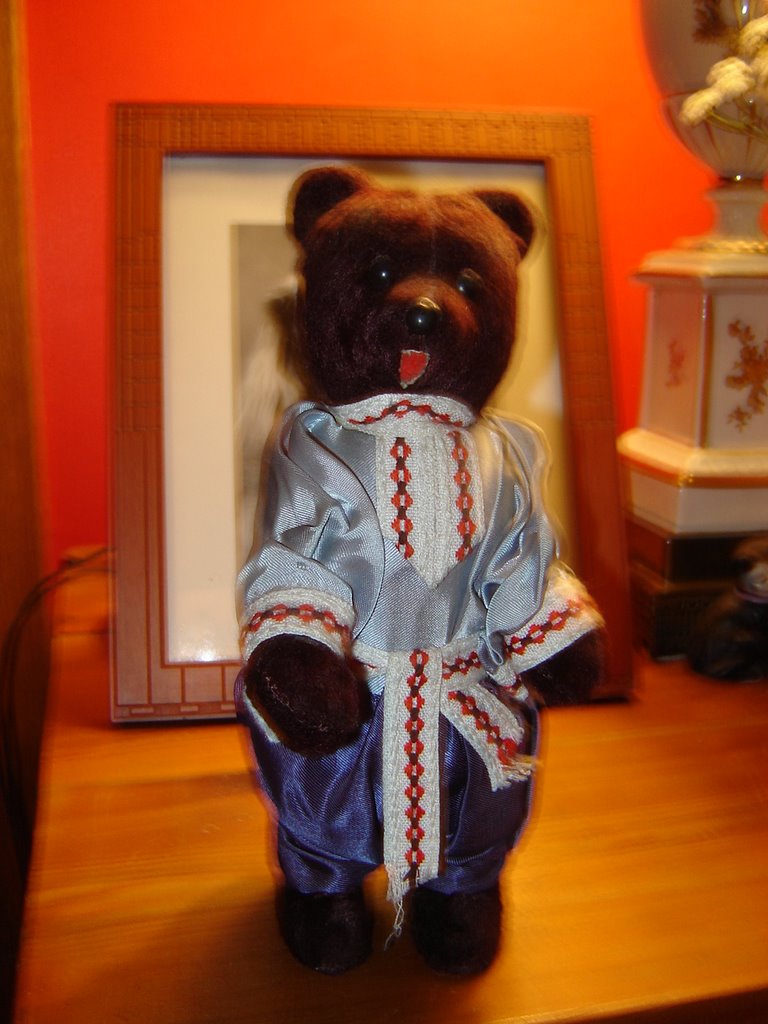
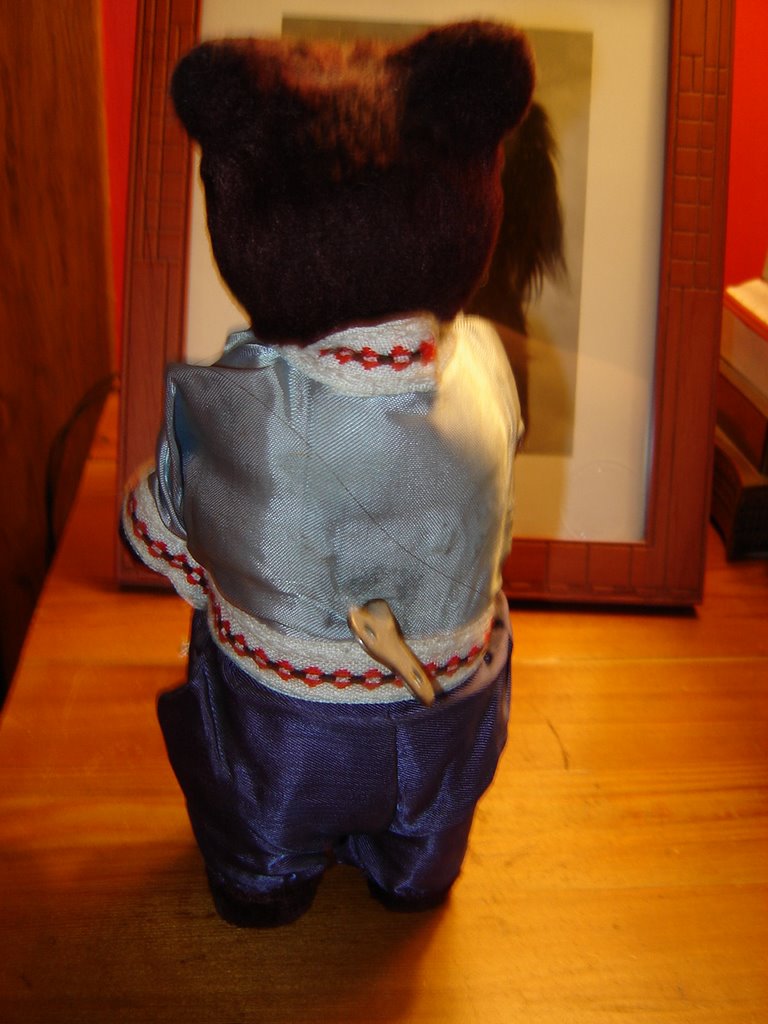
My bear is indeed from Russia and is about 25-30 years old. It's worth a mere $50.00. Maybe he will become more valuable-who knows. I only wish Greg had been right about him!

One thing I should note. While standing in line, it is customary to chat up everyone else in line and share stories about your objects- that part was pretty fun. And it was fun to see the twins and other appraisers in person. I hope you guys don't think I'm a pill. It was a fun day, really. I guess everyone is a critic.

Before anyone gets any ideas of coming and taking these items- they are not located at the Chicago 2-flat.

Coming soon ...more on the Milwaukee trip ...a visit to Brass Lighting Gallery! Now that was awe inspiring.

Thursday, July 27, 2006

Road Trip!

Just what would warrant this busy houseblogging renovator to take a Saturday off "work-camp" duty you might ask? Why Antiques Roadshow!!! of course.

My Dad invited me earlier this summer to Milwaukee for this event. We are HUGE fans at our house. In fact, we can't wait till we get the house more finished and we can start trolling estate and yard sales for hidden and unappreciated treasures. But not just yet...

My Dad is bringing a baby doll that was my grandmother's when she was a child, some porcelin, and an old pipe of my grandfather's. We have a deco style light I wouldn't mind having appraised, but I don't feel like uninstalling it and lugging it around.


Instead, I am going to bring a bit of whimsy
.
My wind up dancing bear. I got him in a local Antiques Mall. I think I paid about $40 for him.


I don't expect him to be very valuable, but maybe he'll be worth more than I paid for him and I can perhaps find out his origins.

At the shop, they told me he was a Russian Dancing Bear, probably because of his costume.

I'll be back (hahaha- see photo at left) Sunday and work all day with my dear close and personal friend Wood pile.

And of course, I'll report on my Dad's and my experience of the show!

Wednesday, July 26, 2006

The iron railing


One of my favorite things we are doing on the building this summer is adding French doors and a Juliet balcony to the 2nd floor. We are pretty certain that there were orginally French doors with maybe a walk out porch on the 2nd level.

We won't know for sure though, until we get ourselves over to the Chicago Historical Society and research the original architect, builder, and occupants of the building. I have instructions from Preservation Chicago on how to research this and am told the staff at the CHS are very helpful too.

While it would be nice to restore the building to it's original state (adding modern conveniences of course), we are seeking to maybe even improve the architecture of the building (interior and exterior) so that it's even more significant than it originally was. This brings me back to our French Doors and iron railing. We often walk our dogs around the neighborhood and look for ideas and inspiration from the local architecture.


At left and above, you see the interesting windows we saw on a local 6 -flat.

Kind of deco looking I think, but the building looks pretty craftsman.


Steve went to work creating various incarnations of the patterns and after a number of trials, we came up with this. It also has a flower motif, which we like alot. The stained glass we have inside our living room has roses and the transom in the kitchen has tulips.

This will be the biggest change to the facade of the building we have done and it will make the building truly unique and it will reflect our style. I am quite excited for this.

Tuesday, July 25, 2006

Ready for inspection! (and the arrival of the Pocket Door!)

The conduit is pretty much run throughout the 2nd floor and we are ready for the City to come and put their stamp of approval. They have two days to come and if they don't show, the work just continues sans inspection.

At left, you see we had to cut a hole in our kitchen wall for the pipes to run upstairs. They could not run outside the building because of the chimney that is there. And really, we like it better not having more pipes outside on our building anyway. But it's another little job for us to repair the wall.

The pocket door came today. It's a solid wood oak veneer two panel door and we got it from Designer Doors. We are happy with the quality and style. They have every style you can think of there.

Sorry for the blurry photo- it was a bit dark up there and the slow shutter speed makes it hard not to get a blur.


We got our pocket door hardware from Johnson Hardware. We bought their commercial grade hardware that's rated for a 300 pound door. Our door is about 71 pounds so we expect it to last a lifetime. Steve also bought three additional bumpers that go inside the wall because once the walls are up and your bumper wears out...well, you just have to cut the wall open. With three extra bumpers, it's highly unlikely that will ever happen.

I worked last night filling trim with wood filler and I was quite tired this morning!

Tomorrow the patio sliding door (with a French door style) is arriving. We had to go with sliding doors to save space. This is why we did a pocket door on the front closet as well.

Monday, July 24, 2006

The electricians are here!

The day has finally arrived and the wheels of the project are going to start turning rapidly again. The electricians have said they will finish in 3 days, so we'll see. After that, our guys will be back to insulate and drywall and they say that will take about a week and a half.

This means that Steve and I have 2 weeks to fill, sand, and stain 1900 feet of trim so that the trim is ready and our guys don't have to wait on us to finish it. This means we will have to start working weeknight evenings until this is done. I will probably have to take a day or two off work also. There go my vacation days.

I do have to say though, that yesterday sitting in the garage with a nice breeze blowing through, filling board after board, soaking up some vitamin D but not frying in the sun, chatting with my neighbors when they passed by, I had an idyllic home improvement day. I really do find restoring old wood very satisfying...(yes, I'm serious)

Except for the fact that I whacked my head really hard on some boards right when I started working and then momentarily blamed Steve because he was right there and didn't prevent it from happening. Once I got past that, everything was peaches and cream. ;o)


more later- must go to day job now!

Saturday, July 22, 2006

Son of a "saw"


Yesterday, Steve rented a 14" gas powered cut off saw to cut out a part of our concrete patio for running the underground conduit.

Sometimes tools can turn into real instruments of torture. Imagine pulling on a lawnmower cord for 45 minutes trying to get it to start up. Well, this is what Steve went through yesterday afternoon.

His hands got a bit tattered as did his morale, but he finished the job.


He did this so that we would be ready for our electrician, who was to come today and begin the job. Well, this didn't happen because of some emergency he had to attend to. We're hoping Monday.

So, we worked some more on the wood trim and sanding, glueing cracked boards, and filling gaps with wood filler. Steve worked on making a stronger "shelf" on the drying rack to hold all the wood. I had to leave for a baby shower at 1:30pm so I guiltily only put in half a day.

The first coat of paint went on in the 1st floor den. I like it. Steve thinks it's a little too bright, but I think it will be fine with the 2nd coat.


That's it for now...

Friday, July 21, 2006

Are you a houseblogger waiting to happen?


Today's Chicago Tribune ran a flattering story on house blogging and bloggers. I hope this brings more local Chicago people and others to blog about their projects. If anyone is here as a result of the story, welcome!

It got me thinking about what makes a houseblogger. I am sure many of us have some ideas about this. Here are some impromtu questions to help you determine whether you are destined to become a houseblog member. Of course this is only my list and is not meant to be comprehensive or authoritative!

Determining your house-blogger tendencies:

1. Do you take pictures of your projects or home before, after, or during construction?
(bonus points if you put them in a photo album or scrapbook)
2. Do you long to commisserate with others in the same pain (of home remodeling projects)?
3. Do you gaze longingly at decrepit older homes and wish you only had the time and/or means?
4. Do you regularly shop at Home Depot, Loews, etc...?
5. Do you find it gratifying to get really dirty while working?
6. Does the idea of stripping layers of paint off beautiful old wood make you practically hop out of bed on a Saturday morning? (yes, I am serious)
7. Do you watch HGTV more than 3 times/week?
8. Do you subscribe to more than 2 "home improvement" magazines? (This Old House, Handyman, Fine Homebuilding, etc...)
9. Do you have family and friends out of town you want to share your house-progress with?
10. Are you looking for a community that can offer you tips and advice and support along the way?

If you answered yes to a few of these, well, the writing is on the wall...

...and if you want to start your own houseblog, click here.

Wednesday, July 19, 2006

The work continues

Things have been at a bit of a standstill for our crew. The electrician we hired told us that his van had been hit and he'd be out of commission for "at least a week." After a week and a half, he came by yesterday with a few guys to look over the project once more before starting. He is going to have a whole crew of guys get the job done in 3 days starting Friday.

So Steve dug the trench for the electrical from the garage last night.

Current codes require this and it seems pretty sensible to us. Plus there's the bonus of having one less wire hanging over our yard.

We picked up the rebuilt window frames for the stained glass windows.

We had these rebuilt because they were rotted and now we are going to have the glass restored and put into the new frames.


Here is a shot of the window. There is a pair of them in each floor.

Steve is picking up the rest of the wood from our stripper on Friday. He has not finished the doors yet but will have them next week.

I'm trying not to freak out about the amount of wood we have to sand. It's not so much exhausting using an orbital sander, but it gets kind of monotonous after a few hours. And we have more than a few hours of sanding to do.

Steve is planning to work on the roof (parapet) in the morning Saturday before it gets hot and then spend the rest of the day sanding.

I promised to go to a friend's baby shower so I can only sand for a few hours Saturday and will do half a day on Sunday.

The fun just never stops I know!

Saturday, July 15, 2006

Wood pile's new home


I spent today, one of the hottest days we've had so far this summer, sanding wood trim. I also glued up some cracked boards. SPF 30 and lots of water.


Steve spent today making a new home for wood pile in the garage, which also will make the task of staining all the trim for the upstairs possible.


Where do you put all this trim while it's drying?


On a drying rack. Isn't it beautiful? The sanded boards are safely tucked in. I probably sanded about 25% of the overall boards today. And I'm really pleased to report that my hands are not numb (that has happened to me before!).

Friday, July 14, 2006

Organizing Door Hardware


A while back, we removed all the oak doors from the second floor to have them stripped. Before we sent them off, we removed the hardware.

It's just as important to have a system for organizing that hardware as it is to mark trim that's been removed, so you know where it belongs.

We here at Chicago 2-flat believe in the "ziplock system." It's very simple, which is how you need things to be when you are removing 9 doors and an apartment's worth of trim in a short period of time.

Every door gets a ziplock bag and all the door's hardware goes into that. Even with this system, mistakes happen. Case in point me on Sunday...."Now where did I put those pins?? I remember putting them in a safe place somewhere...?" When I put something in a "safe" place, that is usually when I have the hardest time finding it. (Note to self: Please stop doing that!)

We are resusing most of the original hinges and locksets- they are in good shape. We need some door plates and knobs. Most of the original knobs & plates are gone and were replaced with cheap brass plated ones that look crappy/corrode after 6 months.


At left is the hardware we are going to use for the apartment. The closets will have glass knobs because I have them, they are original I think, and we don't want to spend more money to make everything match.

Personally a bit of an eclectic touch with knobs etc... does not bother me as long as they coordinate and there is some kind of order. I am curious if most houses originally had completely matching sets in every room anyway. Does anyone know?

We are using the ones at left for all doorways inside the apartment. Glass knobs with similar plates for the closets, and brass plates and knobs for the exterior front and back door. I don't think that will be too hodge podge and we can always change it later.


Footnote: It took between 20-30 minutes per door to remove the hardware in case anyone is interested.

Monday, July 10, 2006

Mecca for Masons


On Saturday morning, we headed out to Crawford Material Company for some supplies for a "little" project that Steve has decided to take on. More on the project later.

For now, I want to talk about how awesome this place was. They had absolutely any supply you would need for masonry work. They had recycled Chicago common brick (we needed 120 bricks). They had every kind of cement known to man, the powders to color mortar, rebar, any kind of patio surface you can imagine, as well as chimney supplies galore. I was seriously in awe. It was all so incredibly organized and professional.

I, of course, had to take some photos and they told me with a friendly smile, "Knock yourself out."


Being in places like this, where the professionals shop, it's kind of like getting behind the curtain in a play or something. I find it totally fascinating. Does anyone else feel this way about these types of places?

Rows of caulk in every possible color. Every tool you need for the job -all in one place- indescribable.

Now for our project...

Steve is going to be repairing the parapet wall. The parapet wall is what you have when you have a flat roof. It's a ledge that goes around the edges of the roofline. Ours is fairly well-deteriorated and Steve is going to grind out the bad joints and rebuilding all the loose bricks AND the chimneys.

I can't believe he is up for this with all the other things on his list (building a medicine cabinet and kitchen shelving among them). He also has to help me sand and stain all the trim for the second floor.

We bought Type N mortar for tuckpointing, 120 Common bricks, Portland cement for rebuilding the chimney crown, grinding wheels for grinding out the joints, Vulcan 116 caulking for the cement joints, a masons brush for wetting down the bricks, and rebar for reinforcing the chimney crowns and preventing them from cracking.

You might wonder how we knew what to buy or how Steve knows how to make these repairs?
Well, let's just say God bless the internet and the Masonry Advisory Council's website.

(Steve promises to photograph and help me document the process from start to finish for the blog.)

Sunday, July 09, 2006

The return of the wood pile


You may remember our friend wood pile's harrowing earlier days freshly ripped from it's ancestral home. Then our poor wretched friend had it's insides removed(nails),was branded(labeled) and left in the dark garage for a week all alone.

You thought things couldn't get worse for our dear friend I bet. Well, you were mistaken. Poor innocent wood pile, who had never left the confines of home, has spent the past 2 weeks with a male stripper being violated. It's a sordid tale, filled with chemicals and lead paint residue. We are hoping that wood pile will forget this torture, forgive us, and live happily in the 2nd floor again. We can only hope.

You might wonder why there is a photo of an adult book store posted on my blog. Well, it's because wood pile underwent its transformation 2 doors away. We found it quite funny that our so-called stripper guy operates pretty much next door to an adult bookstore. It's must be that wood-stripper sense of humour of mine that is so amused by this.

But I'm sure what you really want to see is what wood pile looks like now, right?


Please no cat-calls. Wood pile is feeling a bit vulnerable and exposed right now.


Footnote: This is only about 1/3 of the wood-the rest will be ready next week. It is a BIG relief that it turned out OK to us.

Bonus question: If you search yahoo for "woman stripping" guess whose blog shows up in the number one spot?

Saturday, July 08, 2006

Gardening during renovation

Many a time it's kept me sane when the interior of the house was a wreck (literally).

At times I've felt maybe we should have waited on the yard and concentrated on one area- the interior of the house. But then, it keeps things more interesting to move around a bit and the yard has proved a great comfort and salve for my weary self more times than I can count.

It seems there's a big difference between getting grout underneath your finger nails and dirt from the yard. The dirt from the yard feels more right somehow.

Yard work pays back in spades. Planting bulbs in fall leaves me with a sense of anticipation and something to look forward to come Spring. How will these "paints" play out on my canvas? Watching plants mature and become established for a few years, seeing a robin or morning dove take a bath at our bird bath, or watching my dogs lie in their dirt pile in the sun- all these things remind me of life's simple pleasures.

Oh, there have been times when the renovation has affected the yard, but it's always recovered with a bit of TLC. Even after the recent roof debacle, the grass is greening up again with daily watering by hand.

And because I worked on my yard simultabeously with our house, we've been able to use the yard as a respite.

Gazing out on a "mini" green pasture so to speak.


All is well.

Friday, July 07, 2006

Trim removal 101


We have quite a bit of trim removal under our belts now- an entire apartment full and then some to be exact. It's easier to remove trim of course, when you don't care about damaging the walls, which was the case with this project.

At left, you see me taking the first step, scoring the edges with a razor blade. I did this on all sides of every board prior to taking the next step. Wearing gloves and glasses is recommended to avoid slamming your hands or having lead paint chips fly into your eye.


At the bottom, I scraped up the heavy paint build up to help release the board and avoid cracking it from the pressure or the paint wedging it in place.


Then I carefully edge the small 8" mini pry bar into the edge of the trim. Sometimes a few gentle taps with a hammer help or using another pry bar to hold it. The key here is not to force anything.


Then I move up and down the board edging it out slightly more at a time evenly up and down the board.

We only cracked a few boards, which was really amazing.

The key, in my opinion, is to not force the wood and to gradually loosen it and scraping paint when needed.


And sometimes you do have to pull out the big guns for those stubborn nails.

We used larger pry bars on the base moulding. The base moulding was easier to remove because there is less scoring. After an hour of scoring paint seams, I was pretty beat...but that was just the beginining of the day.

If you're lucky, you'll end up with a pile like this and you'll then get to remove all the nails and label all the boards.

Stay Tuned: We are getting about half of our wood back tomorrow from Darrell the stripper guy!

Tuesday, July 04, 2006

Wish List: Garden Gate


Mojo likes it and we think he has pretty good taste. Add this one to our wish list.

We love to walk around the neighborhood and get ideas. It's nice to take inspiration from local sources.


Here's a close up showing the detail.

Framing 95% completed


I realize framing doesn't look so glamourous in photos, but it represents the bones of the apartment, and it's nice to be at this point. At left is the new front closet with pocket door hardware installed.


The view from the dining room to the living room. We sacrificed a bit of space in the DR to make a larger bedroom.


Here's the larger bedroom as seen from the dining room. The missing floor boards show the original wall location.


A view of the kitchen with the new raised window to accomodate an L countertop.


The bathroom has a jumbo-sized shower nook.


The 2nd bedroom has a larger closet by taking up a bit of the pantry.


The pantry is still plenty big enough.

This week the electrician is supposed to come and work his magic and the heating guy is supposed to run the radiator pipes for the new location of the radiator in the main bedroom.

The roof is still pending too. But the good news is we are almost done buying everything as far as fixtures and finishes. We are in good shape.

I think next weekend I will start stripping the door hardware and plynth blocks and other small pieces of trim. We decided to handle those ourselves. What is a summer anyway, without some stripping? It just wouldn't be summer without it... ;o)

And happy Fourth of July to everyone!

Sunday, July 02, 2006

assessing the damage (and the roof cont'd)


They messed up my lawn.


They squished my hostas.


But they removed 5-6 layers of old roofing material and laid the first layer.

It's mostly an annoyance about the lawn. I finally had a really pretty nice looking lawn and now I have had a setback. They did take precautions- laying down a tarp of sorts, but evidently some of the materials were not lawn friendly and this is the result.

I appreciate everyone's supportive comments, but I don't blame the roofing company for this- it kind of goes with the territory. Roofing is a nasty job- especially a tear off like this. They did try and the damage could have been worse.

Now we need to address the parapet walls around the roof- they are not in great shape. The roofing compay wants to cover them up with roofing material so they can finish the job. Our masonry company says whatever the roofing company says is okay, but we don't completely trust this- he hasn't even seen the walls in question after all.

A new masonry company sales guy came out and said, "Oh, this entire thing has to be completely rebuilt and it will cost you $6000.00" Yeah, right sales guy. Soooooo....Steve called the Masonry Association and they gave us the names of some consultants, who for a small fee ($250) will come out and give an "objective" opinion as to whether the walls can be repaired or need to be entirely rebuilt.

Until this question is answered, our roof completion is on hold. Honestly, where is the pride in workmanship sometimes? Everyone just wants to move on to the next job. What about doing a good job on the current one?