Showing posts with label woodworking. Show all posts

Sunday, February 19, 2012

Reclaiming space

For years, we tossed around ideas for our small foyer/entry. This was one of those things that we have really needed as we do not have a coat closet in our humble 2-flat floor plan.

Perfectionism led us to procrastinate for quite a while. Maybe Steve should build a hall tree, maybe we should find one at an estate sales, etc...

Finally, we decided to just trim it out and add hooks. Top it off with some artwork, and this was probably one of the easiest projects we have ever pulled off. And it was an instant fix for getting coats off chairs. And now that space is actually good for something, probably it's intended purpose!

Steve got quarter sawn white oak so that the grain would match the original straight grain of old growth oak trim, which is what we have in our home.

We purchased polished brass hooks from Rejuvenation and Steve aged them using ammonia. He used 28% ammonia hydroxide, which is what is used for fuming in traditional arts and crafts furniture. He exposed it for about 5 minutes, which pretty much aged them 6 years. So they match the other brass switch plates in our home. Devil is in the details...

Bolstered by the success of this small project, I am now looking at what else I can do around here... until we are able to go crazy and make the basement into usable living space that is.

We're not going anywhere...

Sunday, April 19, 2009

Kitchen Table Progress

I think I may have mentioned before that finishing a piece of furniture can take as long or longer than the building it. Wood is a natural material and it can be tricky and even unpredictable.
Steve did quite a bit of research as he has never worked with bird's eye maple. He did do one shelving piece in maple and that was trickier to finish than white oak, which is what he usually works with.
Of course he consulted the internet and his favorite publication: Fine Woodworking (that's besides his other fav publication Fine Homebuilding). He even emailed the author of "Three Finishes for Bird's Eye Maple", Teri Masaschi to ask a few questions. And she very kindly emailed back!


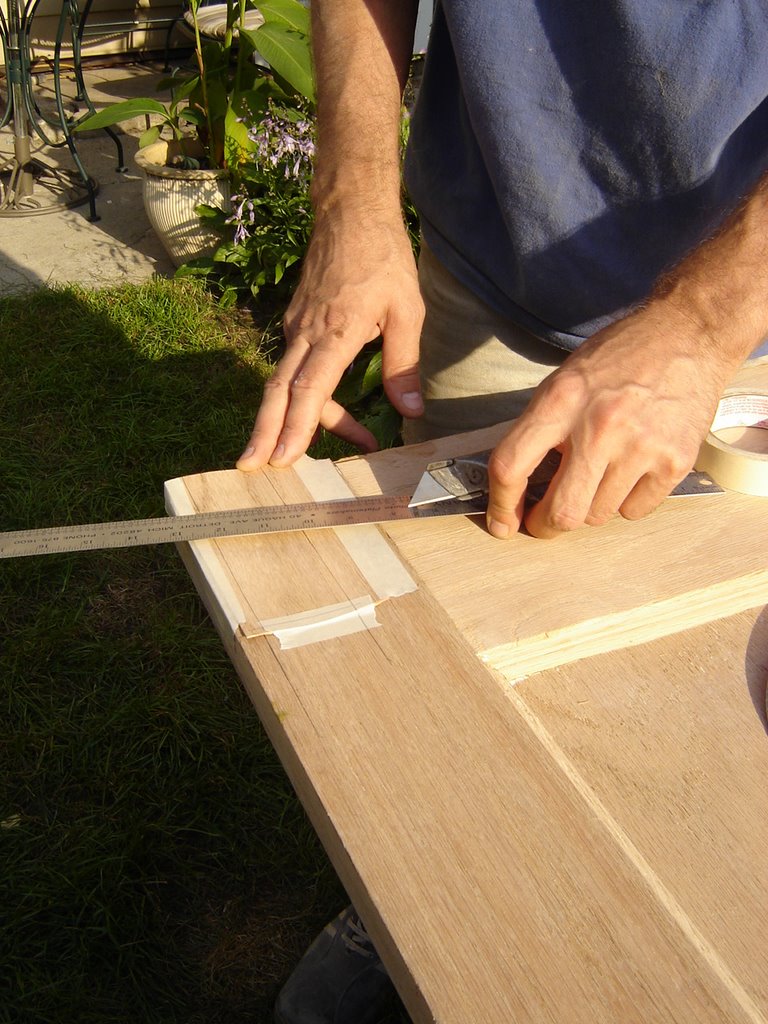
Steve has been working on finishing the bird's eye maple table top for a few weeks now.
For anyone who is a newbie at woodworking, you don't just go and slap some stain on wood after you are done sanding. That would not be wise because as I said, the wood can be unpredictable.
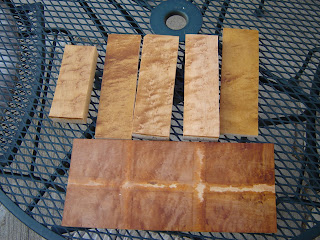
Steve always makes some test pieces to determine how the wood takes the dye, stain or shellac, etc... Here you can see the variations he came up with with different layers of dye.
We selected the top center board color as it is lighter than all the oak in our kitchen and we feel it will offer a nice contrast and show off the figuring very well. What do you think?

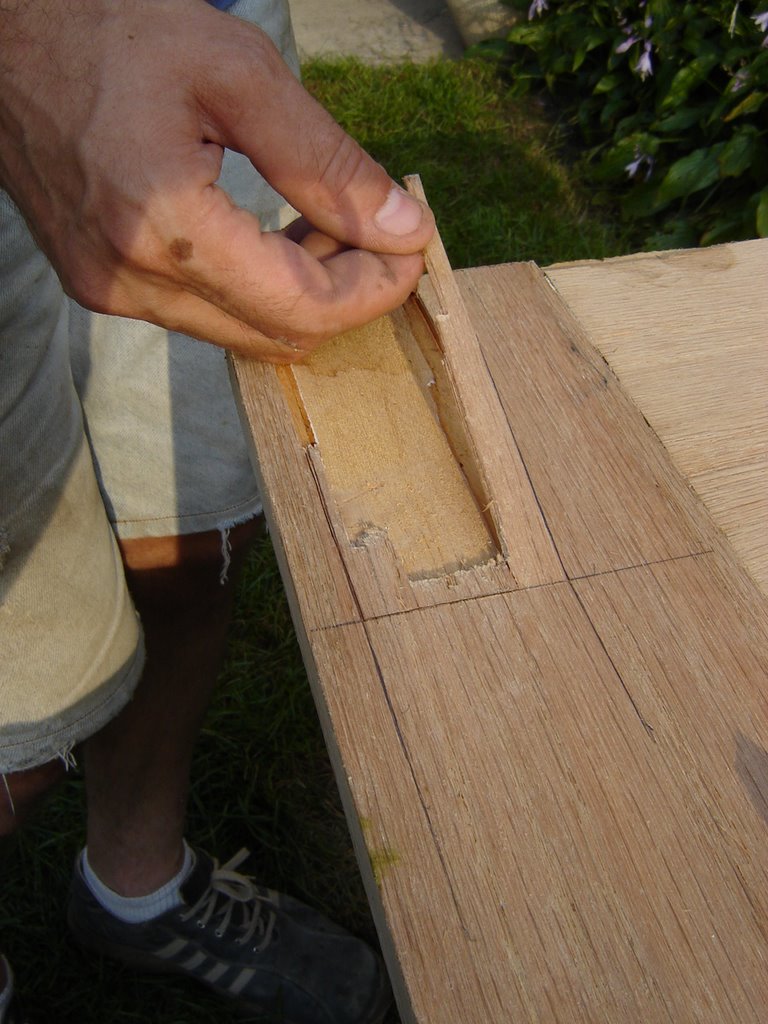
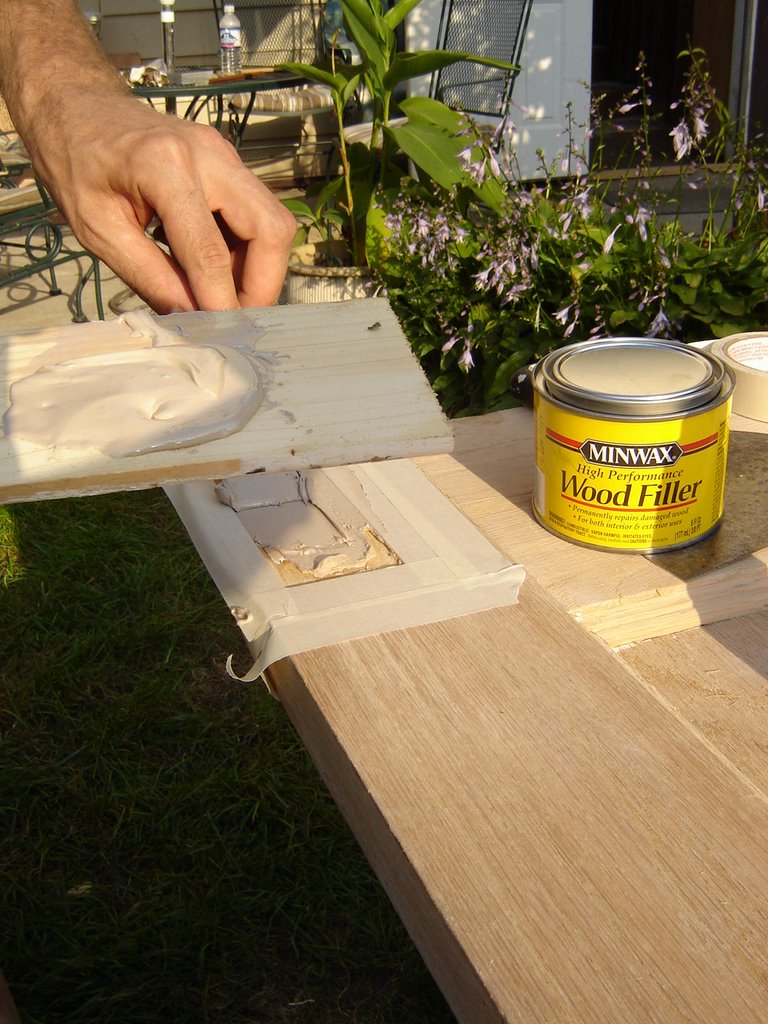
One thing that came up with this particular project is that some of the "bird's eyes" popped out. They were filled with a fill stick as you can see here.
Steve decided to use a combination of gel and shellac for the finish. A few kinds of shellac that I will post about later as I don't have the details right now. He is in process of applying several coats of shellac and just last night after putting on another coat, he discovered some "ghosting."


No, our table top is not haunted. It just has some white film on a section of it. Not the look we were going for. There are many reasons this could happen. Possibly there is too much humidity in our basement and higher water content in the shellac then caused this. Possibly slight residue of sanding was left and became embedded in a layer of shellac. You see what I mean about tricky

So now, we have the dehumidifier going and Steve is contemplating sanding off some layers and beginning again with the shellac. It's tricky. More to come.

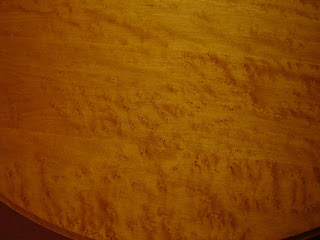
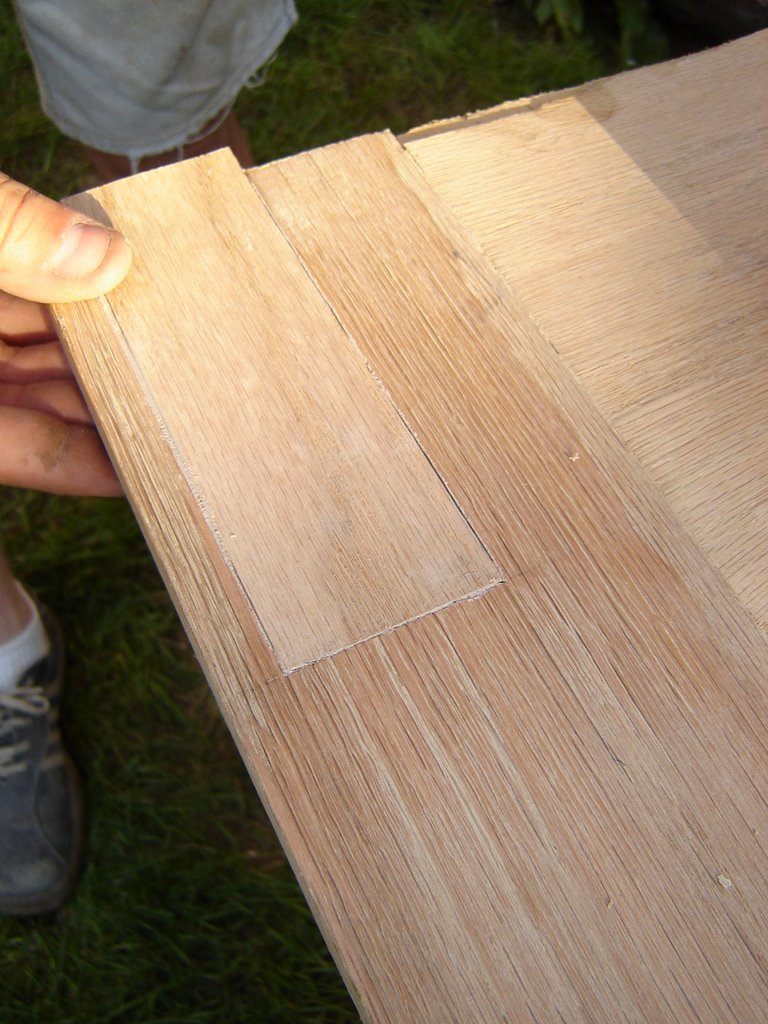
But as you can see here, this wood is so pretty, it's work all the effort. Finishing is really the hardest part to woodworking!

Thursday, November 15, 2007

Last Ditch Effort

We are determined to get the new (salvaged and restored) garage door in this year. Mark my words.

I've been busy and remiss on blogging, but over the past weeks we have accomplished the following on our lovely salvage find:

Steve built a completely new door jamb with an arched header. He made it out of pressure treated lumber as it will be outside and painted.

I scraped the one layer of paint off the door, sanded it. We installed the hinges.

We hung the door inside the jamb. I am proud to say we have a completely pre-hung door that Steve made from scratch.

Steve fabricated replacement muntins for the window panes (several were missing) at the Loyola Park woodshop.

We still have to go to the locksmith and buy the lock and put it in. Then, we have to hang the door and install the locks.

All this in November! Chilly chill!

Last Saturday, Steve & I spent the whole day outdoors working on the hinges and getting the right fit with the planer etc... Our neighbors on either side were outside working too...for a few hours. Not like us cuckoos out there from 9am till 5pm. But by God, we'll get it done!

Monday, October 15, 2007

The Twilight Zone

Since I'm on the theme of old cheesy TV shows from the 60's and 70's I'll stick with it. The photo at left is the kind of twilight zone type thing you'll see while salvage shopping.

Imagine being in a huge lofty warehouse building looking through rows and rows of doors with miscellaneous baby carriages and strollers strewn about. Where are you?


Why at Salvage One of course! I have to say that I absolutely loved the place this time visit. Not only did I love the space, but I loved the fact that their door prices were waaaay lower than my previous entry.


So, we went through some more doors. I swear, we must have touched a few hundred in one day.

Look at this cute little baby door! I wanted to take it home.


So many different and cool doors. I love doors. I'm just kind of tired of sanding wood you know? If only they would sand themselves.


Of course, when you go salvage shopping, you have to look around. A room of porcelain!! To a houseblogger, this is like stumbling on Aladdin's treasure.

We found a door similar to the the one at Architectural Artifacts. We found many cool doors that were not the right size.


And then we found this door with muntins like what our original windows had. Hmmm....


It needs some work. Some of the trim pieces that hold the glass in have to be re fabricated, but woodworker Steve can handle that. There's one coat of paint on it but 'Dirty Jobs' fan Jocelyn can handle that while grumbling a little.


As you can guess, we bought it.


To be continued...

Thursday, August 02, 2007

The stuff dreams are made of

I realize this post title is quite lofty, but this post is an ode to someone I've never met but whom I admire greatly.

The model planes you see here were made by my Dad's partner Dave's Dad. When Dave was a little boy, his Dad spent hours and hours making these model planes and boats. Not only did he pay attention to every detail, but these creations also actually worked. The airplanes really flew. The boats sailed on water.

Dave told us about how some airplanes his Dad built would crash and then he'd just make another one. He told us how his Dad would take him out to put the boats into a lagoon. I've always loved the image of this. And even though I never got to meet Dave's Dad, I can see just a bit how this kind, patient and very intelligent man came to be with a Dad like his.

Here is the boat. I was just in awe of these when I saw them. These were not kits. These were made from scratch!

But one thing was missing. The boat needed a stand. And that was a job for ...Steve the woodworker...

A small job, but that boat deserved to be on a stand not a pillow.
The stand is almost done. It's made of oak and coated in 4 cans of black spray paint to have a smooth finish. Steve didn't fill the grain, so it took alot of paint to get that perfect surface.

I will post photos when we bring the stand over this Sunday.


Some more photos for the heck of it...

Steve and Dad measuring the template.


The boat with template. Template made out of fome core board and glued together with hot glue gun.

Tuesday, February 20, 2007

Off to the Wood Shop!

This is the week Steve is going back to the wood shop. His first project is fabricating bed rails for a headboard and footboard set that my Mom purchased last year.

I don't have photos of the bed right now, but I will post them eventually. The bed is made of walnut and Steve and my Mom made a field trip last summer to Wood World. They spent about an hour going through wood and selecting the appropriate boards for this project. It was not inexpensive, but she got the bed at a yard sale for a nominal sum and its a charming walnut piece with some painted decoration.

We have a long list of projects waiting in the wings. I am most excited to finish the built-in shelving for our pantry. And the plate rack. And the sideboard. And the dining room chairs. You see, we won't be running out of material for houseblogging anytime soon...

Anyone new to this blog can see some of Steve's finished work in the sidebar. Everything he knows, he taught himself from books or from instructors at the wood shop.

Monday, December 04, 2006

Problem Solving: Patching a Damaged Veneer

So you have an old door and it's in pretty good shape, but the veneer has cracked off in a few places. How do you repair it?

I'm sure there is more than one way to accomplish this type of repair. This is just what we did and it worked pretty well, so I thought I'd share. I really think much of DIY work is made up of logical steps and if you can problem-solve and consult the appropriate resources for information, one can accomplish quite alot. It's comforting to me to think in terms of steps- it keeps things from being overwhelming.


First thing we did was square off the damaged area for patching. It would be next to impossible to cut a piece of veneer to fit jagged edges like this and if you match up the lines on the veneer, the patch will blend even better.


Then we cut out the area using a straight edge and razor knife. We carefully removed the cut out area for patching.


After measuring the area, we cut the piece out of the rolled veneer using a razor knife. Next we tested the fit.


The oak veneer we had was only 1/4" and the veneer on the door was thicker. What to do?


Our solution was to use wood filler to build up the thickness and then place the patch atop a bed of wood filler.

Here we were checking the fit of our precisely measured patch.

We leveled off the wood filler for placing the patch.


Then we carefully placed the patch trying to keep the level of the patch in line with the door panel.


After drying time, which is blessedly short with wood filler, we sanded the area using 100, then 120 grit and a finishing sander.


The end result? A damaged door is solvent again and the patch is barely noticable to the eye after staining. We learned after repairing this door, that if you can match up the veneer grain, your patch will be even more seamless. We've since done this patch a few times and are happy with the results.

Monday, November 27, 2006

Weekend Recap

As previously reported, Steve installed the stairway railing this weekend. Nothing fancy, but we improved on what was there in that he made the railing in two pieces instead of four (what was there) and we used all oak rather than a mix of pine and oak. And we used better hardware.


Unfortunately the metal angles Steve was planning to also use to reinforce the connection on the angles did not want to cooperate. Suffice it to say, there was some cursing and crabbiness and ultimately the railing went up without them. At one point I said to Steve, "Can you lower your standards maybe a little?"


And here is Steve buffing out the grout haze. This buffing pad worked but it was still a tiring job.


While Steve was fighting with the railing on Friday, I was busy on my holiday decorations. It was about 60 degrees outside and I thought that was a good time to be outside stringing some lights. It's hard to get a good photo though.

I love the oversize more old fashioned bulbs. I used to be an all white light gal, but not anymore.


And what do dogs do on Thanksgiving? Why, they sit and wait for the turkey to be done of course.