 I think I may have mentioned before that finishing a piece of furniture can take as long or longer than the building it. Wood is a natural material and it can be tricky and even unpredictable.
Steve did quite a bit of research as he has never worked with bird's eye maple. He did do one shelving piece in maple and that was trickier to finish than white oak, which is what he usually works with.
Of course he consulted the internet and his favorite publication: Fine Woodworking (that's besides his other fav publication Fine Homebuilding). He even emailed the author of "Three Finishes for Bird's Eye Maple", Teri Masaschi to ask a few questions. And she very kindly emailed back!
 Steve has been working on finishing the bird's eye maple table top for a few weeks now.
For anyone who is a newbie at woodworking, you don't just go and slap some stain on wood after you are done sanding. That would not be wise because as I said, the wood can be unpredictable.
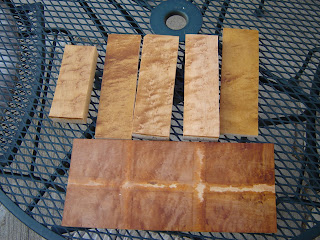
Steve always makes some test pieces to determine how the wood takes the dye, stain or shellac, etc... Here you can see the variations he came up with with different layers of dye.
We selected the top center board color as it is lighter than all the oak in our kitchen and we feel it will offer a nice contrast and show off the figuring very well. What do you think?
 One thing that came up with this particular project is that some of the "bird's eyes" popped out. They were filled with a fill stick as you can see here.
Steve decided to use a combination of gel and shellac for the finish. A few kinds of shellac that I will post about later as I don't have the details right now. He is in process of applying several coats of shellac and just last night after putting on another coat, he discovered some "ghosting."
No, our table top is not haunted. It just has some white film on a section of it. Not the look we were going for. There are many reasons this could happen. Possibly there is too much humidity in our basement and higher water content in the shellac then caused this. Possibly slight residue of sanding was left and became embedded in a layer of shellac. You see what I mean about tricky

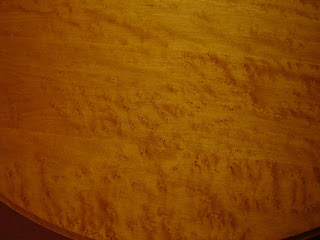
But as you can see here, this wood is so pretty, it's work all the effort. Finishing is really the hardest part to woodworking!

7 comments:
Wow, it really does look beautiful. One of the reasons I get nervous to start a project is knowing I might screw it up in the finish. Good luck with that. I wonder if google offers any good links about that ghosting?
Thanks :o)
Oh, Steve is all over google and he found some good info, but it's like there is no bible with these things.
hello... hapi blogging... have a nice day! just visiting here....
do you all have any recommendations on wall paint primer? someone has painted the walls and fireplace surround of my new house a series of truly hideous dark colors and they need to be light and bright.
thanks in advance.
We actually had dinner with a friend who happens to be a professional painter this weekend and this very subject came up at dinner.
He said that priming is not needed. The main thing is to sand and prep the walls properly and then 2 coats of the new color. Three if needed. And use a good quality paint. Hope this helps!
thank you very much.
Hi Steve and Jocelyn,
I'd like to let you both know about our Best Home Renovation Contest. There's a chance to win up to $2,700.
Here's the link for more information:
http://www.repair-home.com/project/
The contest is simply uploading before and after photos.
Have a great day,
Isabela
Post a Comment