Showing posts with label front door. Show all posts

Monday, June 04, 2007

These things take time

As you well know, a project done right takes way longer than the latter. If we just slapped some paint on our front door and called it a day, we'd have been done weeks ago. Instead, we are doing a "This Old House" quality repair and it's taking a bit longer.

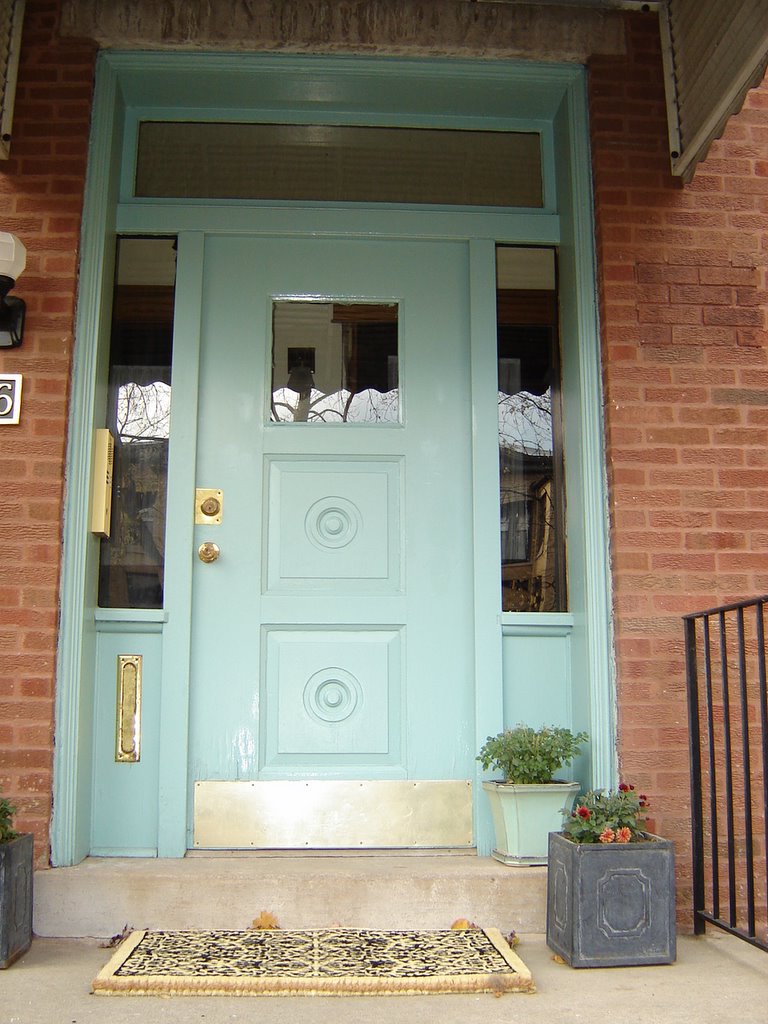
At left you can see the trim has been primed and painted with two coats of Sherwin Williams oil-based Bunglehouse Blue. We reserve the option to add a third coat. On Saturday I scraped all the excess paint off the glass and cleaned the windows. I like the new color.


Also, on Saturday I tackled repairing the buckling veneer on the front door. I used a razor knife and cut out the failing and rotting areas and then using contact cement, glued 2-3 layers of oak veneer into place. Here you see everything clamped up to dry. I also sanded the door and filled any holes or dings with wood filler.

We decided to get a new unlacquered solid brass kickplate, which is going to run us about $82.00. This proving my theory that projects we undertake always go overbudget because we always seem to find a way to add something else. But it will look really nice, last virtually forever, and fit the door better.

I know I could go searching for the right one on ebay or salvage, but we have too many other projects to get going on so we are paying for convenience this time.

What did Steve do while I was working on the front door? Install a 18000 BTU air conditioner in our tenants apartment. He made a custom ledge out of oak stained to match the trimwork that raises the a/c above the vinyl window frame. It is a thing of beauty. No a/c eyesores in our building.

Incidentally, our tenants seem to be working out pretty well. On Saturday one of them told me how much she loves the apartment and how her friends are all jealous. They are quite sweet and considerate so far.

Sunday, May 06, 2007

A Thorough Scraping


It's all about the prep work and we are not rushing our front door paint job this time. The better you prep, the longer the job will last. Also, the longer the job will take to complete. It's kind of a double-edged sword.

Saturday morning, Steve and I got to work scraping the loose paint off the front door trim We then filled any holes with wood epoxy and then sanded it all with 80 grit. Then we primed it with Sherwin Williams oil based primer. Stinky stuff oil paint. Then we prayed for no rain.

I like when Steve and I work side by side. Saturday morning I had the thought, "the couple that scrapes together stays together," and then I thought wryly, it's time for an intervention. Steve said our prep job was going to be "This Old House" quality. Uh-oh.


This morning when we reviewed our work, we decided that more sanding and filling was in order. Why not do it right?
I have to go out of town for a trade show in Las Vegas this week, so it will be up to Steve to keep this project going till I get back next Sunday.

Monday, April 30, 2007

Front Door Redux


Before our awning is installed, we'll be repainting the front door a more period appropriate color. Our home was built in 1910 and has some arts and crafts elements, so we are sticking with that color palate.

We have selected Sherwin Williams Bunglehouse Blue for the front door. The awning is a True Brown with a white key pattern trim. Our awnings will be shaped like this though, not rounded as in the previous link. We have delayed the awning for 2 weeks so we can thoroughly prep the door, repair some minor wood rot, and prime and paint it.

We have learned from experience that it pays to buy the best paint you can afford. Take our living room for example. We were not trying to be frugal. We just bought the paint brand they had at our local hardware store. Our living room is a deep red color and it took several coats to get full coverage. We ended up going back to buy additional paint, which cost more money anyway.

Another tip when painting is not to buy cheap rollers. We learned that painting the living room as well. We ended up with little pieces of fuzz all over the walls. Quite disheartening at the time. I never notice the flaws now, but our painting skills have much improved since that room was done about 5 years ago. My advice, buy the best rollers you can afford unless you like bits of fuzz everywhere.

Just some little lessons we've learned along the way.