Tuesday, May 31, 2005

Part II: The Bad

This is the 2nd installment in my "The Good", The Bad and The Ugly" series to be followed by "The Beautiful" for inspiration. To clarify, "The Bad" by our definition could otherwise be known as "all muddled up" . These are instances where people have muddled up an existing home with inappropriate materials or poorly done additions etc... Similar to what you see on the last page of Old House Journal magazine.

Most of the homes below are within a mile of our 2-flat.

What did it look like originally? I see a single family dwelling buried beneath the swiss chalet motif, aluminum siding, and stucco porch. Looks like generations of muddlers have lived here.

Here's another aluminum siding addition added onto a grey stone 2-flat.
The beauty of the building is buried.


The building below has had some kind of scaffolding on it for a few years. And it has a year round nativity scene with a Santa in it in front of the building.
Brown siding or picture windows or open porch/decks? You decide.


I just don't understand multi-colored cinder block combined with a beautiful greystone. And to top it off, they cemented what little yard they have-maintenance free I suppose. This one in particular stymies my imagination. I just can't believe that anyone would think it looks good. To top it off, I believe they built the new porch level, but the 2-flat isn't!


Next installment: "The Ugly": beautiful homes in a state of deterioration and disrepair.

Disclaimer: These are only my opinions. I respect that others have different tastes and need to be saved from their own bad remodeling choices.

Sunday, May 29, 2005

They're baaaaccck....

Ludington architecture was not so very spectacular. There were some nice Victorian homes on the main road to downtown, but we didn't feel compelled to take photos. I did capture one craftman influenced home that we admired. Not totally done in period, but a nice structure.

I like the columns, front porch, and stone base.


Love the stone.

As I reported, we got the car back with no damage. It was parked about 6 blocks away. The city found the address the next day. We were relieved and we had a great time in Ludington.
But you won't believe this next part. Life is just too ironic sometimes- it's unreal. I refuse however, yes REFUSE to believe we are cursed with vacations.

As we were leaving today, we were getting the car packed up and our 2 dogs in. In the confusion, dogs in and out etc... we both forgot to close the back passenger door- the one behind the driver's door.

Before you dog owners get worried, we didn't run over a dog or anything. But what did happen is when Steve backed up the car, the door scraped across his parents brand new Ford Taurus and scraped it up as well as damaging the door on our car- or should I say MY MOM's car.

His parents sounded their horn before we realized what was happening and by then it was too late. Can you even believe this? I can't. So now we have to deal with getting the cars repaired and telling my Mom tomorrow when we pick her up at the airport. I just can't be upset about it-maybe I'm in denial- but I refuse to have this ruin our lovely weekend.

Needless to say, Steve is quite drained (and pissed off) after the whole thing and I don't know if the brackets will be addressed tomorrow. And I am smart enough to know that now isn't the time to ask.

This whole thing reminds me of the time a year and a half ago when we were crossing the street near our house and a car came out of nowhere and ran over my foot. Oh, and that was on my birthday too. But that's another story...

When bad things happen to you, whenever possible, just laugh. Hope everyone has a good holiday weekend!

Tuesday, May 24, 2005

On the road again!

OK, I know this whole thing isn't exactly house-related except to say that it involves a break from house "work". But the good news is we found the car. The good old City of Chicago in its wisdom decided to move it but we couldn't find out where until today. It was about 5 blocks away from our house parked on a side street.

Needless to say, I was quite grateful though emotionally drained. I think I'll be able to relax on the trip though after this little bit of drama.

I promise to take photos of cool Ludington architecture. It's actually the #1 tourist destination in Michigan- Steve's parents tell us. Being so Chicago-centric, I always thought it was New Buffalo, which I love and it's less than 2 hours from Chicago. There isn't a Walmart to be found anywhere near there and that makes it special to me.

And to make this post more legitimate: here's what will be waiting for us when we come back.

They look good enough to eat, don't they?

I feel like a kid and the brackets are christmas presents under the tree waiting to be opened.

and thanks Grex, Trissa and others for the kind words.

Monday, May 23, 2005

Car trouble

We were planning a trip to Ludington, MI this weekend to visit Steve's parents. My Mom is in England for a few weeks and was kind enough to lend us her car for the trip, which would save us the expense of renting a car. Over the weekend we used the car to run errands, take the dogs to the vet, etc...

Yesterday we parked it down the street and forgot we had moved a metal construction sawhorse to get into the spot. We didn't see any signs posted either. Well, this evening as Steve was watering the grass, he noticed the car was (sigh) ....gone.

I feel like we are cursed. Whenever we try to take a little vacation, something goes wrong. Two years ago we attempted going to Ludington for hiking and we found this "cute place" on the internet that turned out to be "a dump" and it poured rain the entire time. The only channel the TV got was the Lifetime channel. And last Spring we went to Miami and I got very upset because Steve started smoking on the trip- it kind of ruined the trip for me somewhat. I used to smoke- but I hate smoking and it really upset me that after a year of not smoking he did something stupid like that (He still hasn't quit).

To make matters worse with the current car situation, all the paperwork we have on the car is guess where? The glove compartment-quite a handy place if you should be stopped by the police, but not so handy when your car goes missing.

We just came back from the police station where Officer Steele (what a name!) was kind enough to provide us with the VIN and license plate number. But he also checked the computer and it didn't show up in the city's "system." So, we filed a stolen auto report.

I am:
1. Horrified my Mom lent us her car and it's gone.
2. Really saddened that we may not be able to take our trip.
3. Defeated (after a few bad vacation experiences).
4. Trying to figure out how to make lemonade if this trip falls through.

Anyway, this isn't really house-related but I felt like sharing my total bummed-outness

Saturday, May 21, 2005

My next project: Front Entry

Since the kitchen is winding down and most of what needs to be done falls under Steve's area of expertise, I have been itching to get started on another project. Certain family members have politely suggested we "take a break" after we finish the kitchen project. Even though I suppose a break would be in order, I just am not in the frame of mind to pause right now. We have so much to do and it's almost summer, ideal stinky project weather!

I have to admit at times the length of this project has stretched my patience to the breaking point, but really we humans have quite an unlimited supply of patience, we just have to tap into it. Some don't cultivate this quality and certainly our instant gratification culture doesn't encourage it. But anyone doing something themselves for the first time knows that there is a learning curve. Take surfing as an example. You don't usually go out on your first day and hang ten. It takes time and practice and patience. If it's something you enjoy, you probably have the patience for it. If not, you'll probably chuck it.

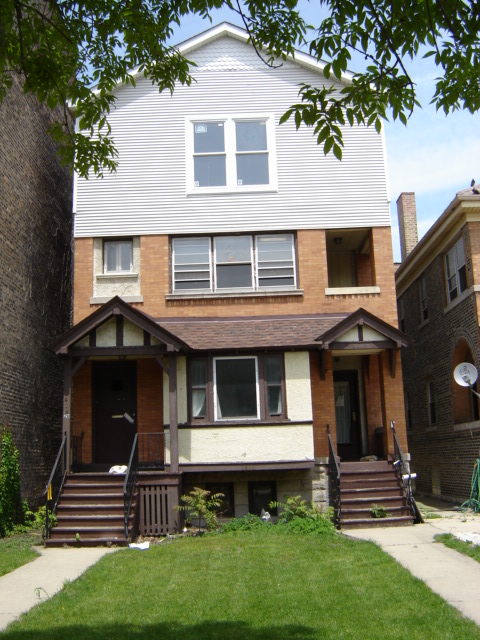
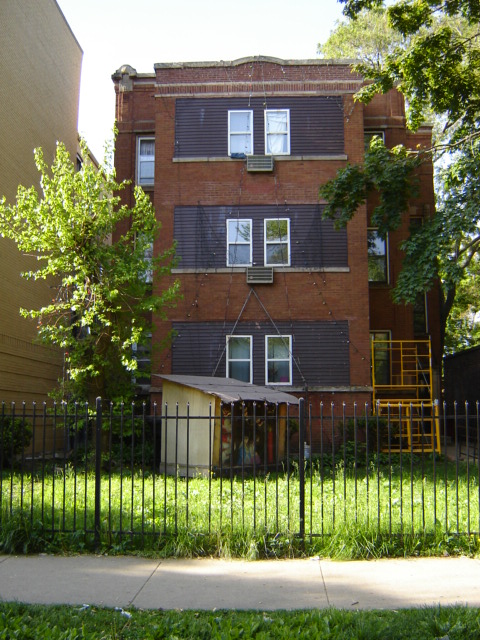
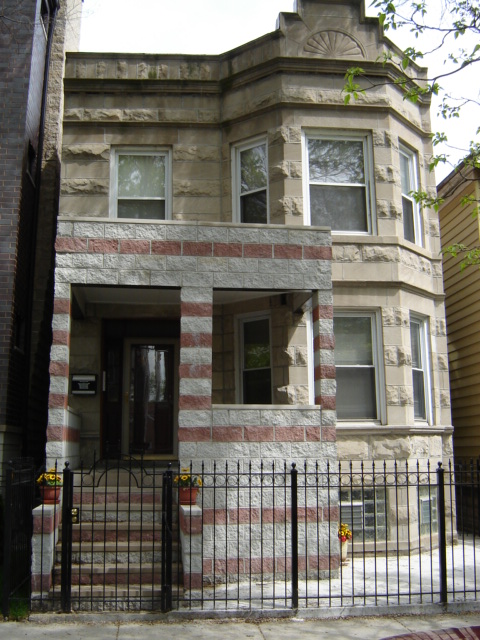
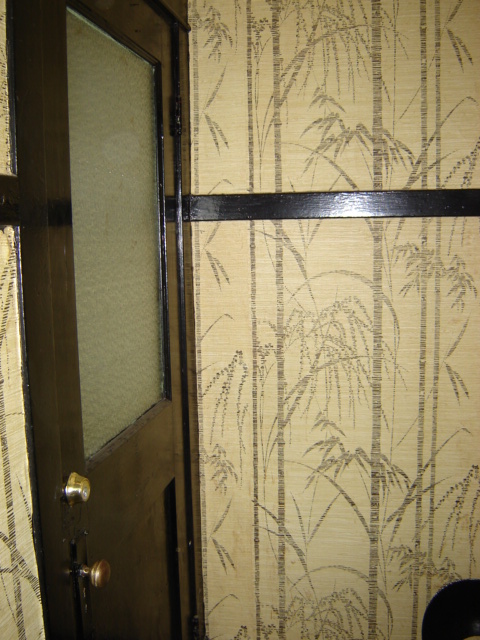
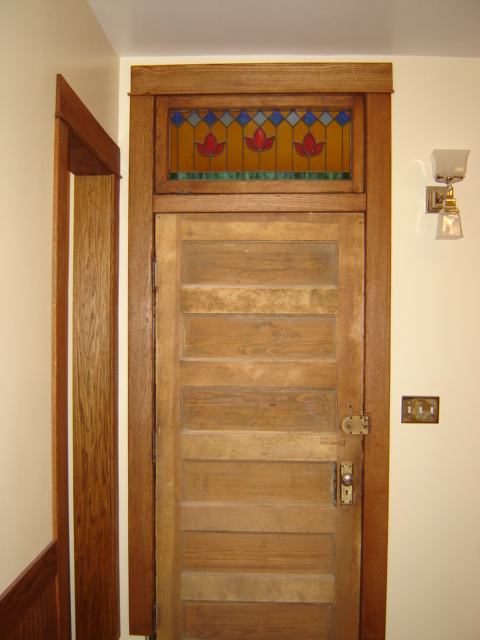
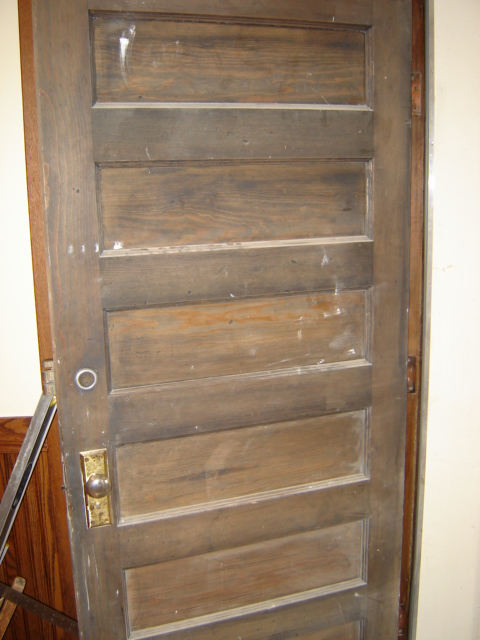
The next project I am planning to tackle is our front entry. Since this is a 2-flat with 2 units, we have two entry doors-one leading upstairs to the 2nd floor unit and one to the first floor. This room has some truly hideous wallpaper in it that has seen better days. I am fond of saying that it "brings down the house" but not in a good way.

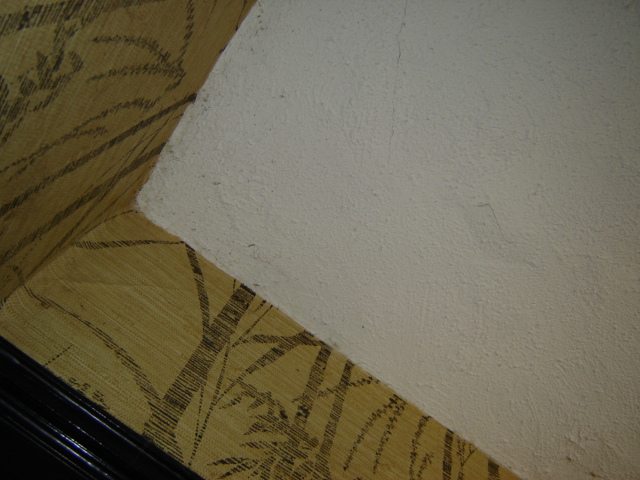
My first task will be to remove the wallpaper and inspect the walls. I am planning to repair the plaster and probably take down the ceiling as it's popcorn and in bad shape.


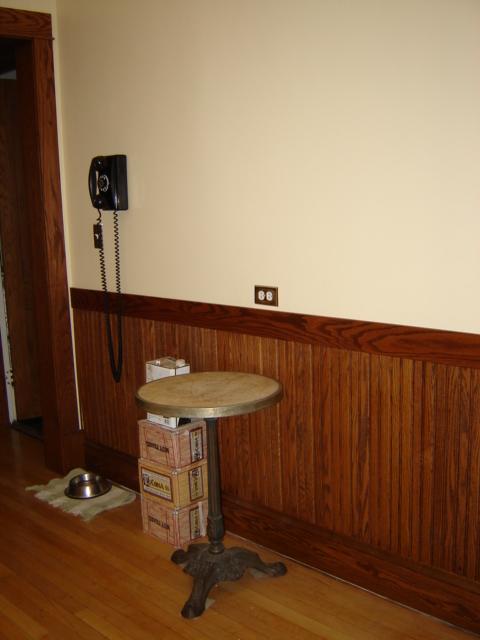
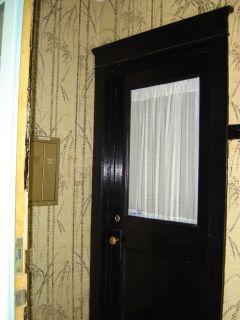
1960's mailbox we do not use and will be removed.

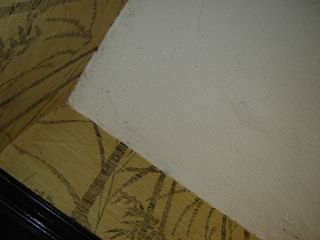
popcorn ceiling 's gotta go


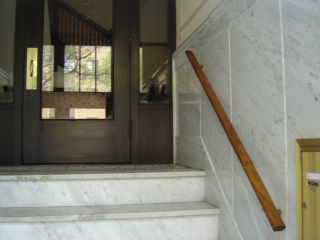
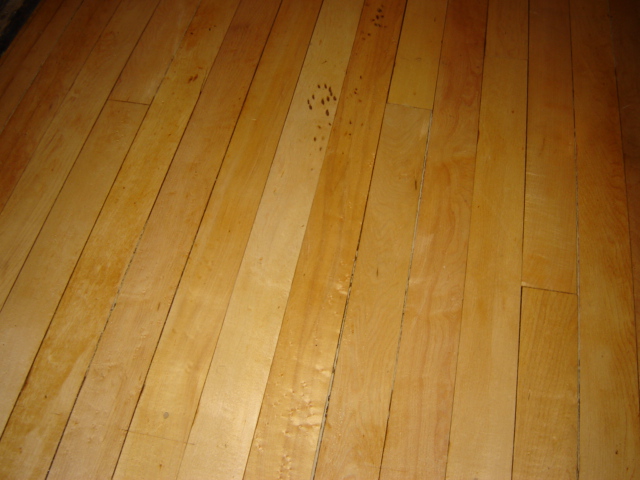
Original floor and quite a popular design in Chicago. I've seen quite a few like it in this neighborhood. It needs a good cleaning.

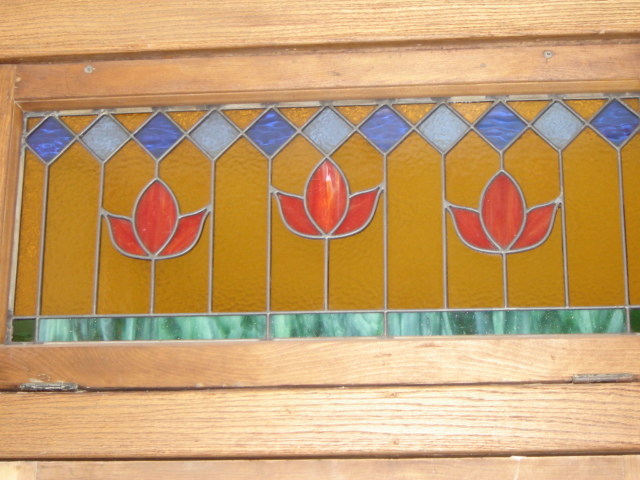
Also on the list: strip the woodwork around the doors and base moulding. Rewire sconce. Clean floor well. Get matching glass for both doors with curtains for unified look.

As far as what we will do with the entry, I'd love to put slabs of white and gray marble in there. That is common around here in entries and looks lovely.


It also very durable, but we may not be able to afford that right now. Other options are wainscotting or embossed wallcoverings that you can paint over. If money is tight, we'll just paint it a darker color on the bottom and white above the moulding. That would be a huge improvement over what's there now. I am planning to start this project in a few weeks.

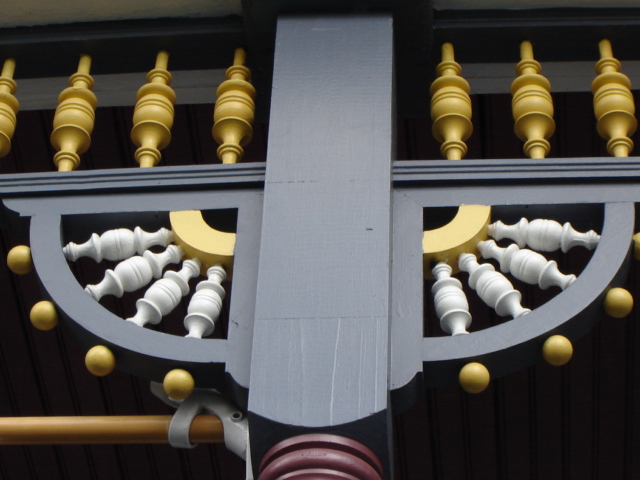
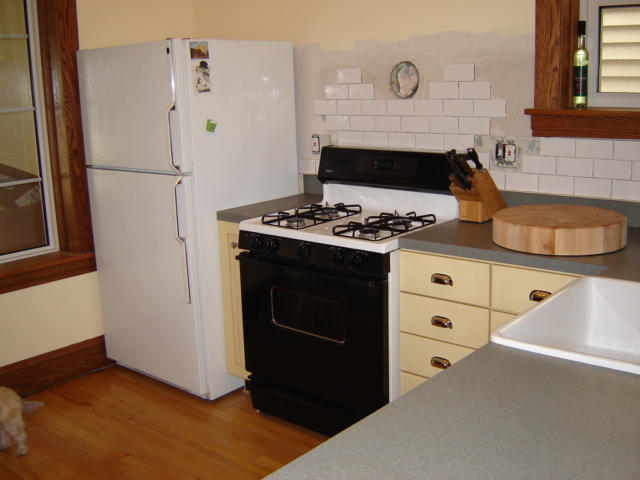
This weekend we were sanding the brackets after they were assembled and filling any cracks with shellac and sawdust. This week Steve will be staining them. I know last week I said we'd be tiling. It's that eyes bigger than stomach syndrome again!

Friday, May 20, 2005

Walking the neighborhood...The Good

We live in a somewhat transitional neighborhood in Chicago. It's been through alot of changes over the past few decades. After the riots in the 60's many people fled the city for the burbs but more recently people are coming back and city living is getting very expensive.

Right now our neighborhood has some typical city problems: drug dealing, loitering, litter, graffiti. But don't get me wrong, this is a nice neighborhood - we just have some "issues."

I've been wanting to do some posts about the neighborhood related to old houses. I've really enjoyed seeing slices of life from other people's blogs lately. Grex over at Petch House showed us some amazing Victorians and Jess over at Bungalow High had some great ones. And of course, we can count on House in Progress for capturing shots of Bungalows wherever they roam.

Here's a few shots of a few of our favorite houses in the neighborhood. One advantage of walking everywhere is you get to know your neighborhood pretty well. These are also homes that have had quite a bit of work done and I think reflect their owners personality.

This is an unbelievably quaint home, we call cottage-like.


I like they way they made this one their own with the paint colors.


Close up of the unique paint job (purists may not like)


A Nice Victorian recently restored.


Close up of wood work


This one was also recently redone and has a lovely Japanese garden.

My plan is to continue this saga in the spirit of Sergio Leone.
The first installment: The Good
Coming soon: The Bad
To be followed by: The Ugly
And so as to not end on a negative: The Beautiful!

Thursday, May 19, 2005

A nice diversion

Well, tonight was kind of interesting and different. I was somehow selected for a market research study and 3 very nice guys came by to talk with me about guess what? My picture taking habits. Of course, I ended up talking about the blog and the community here and our house documentation.

Before I started this blog, I had a photo album with pictures of our progress room by room and in the garden. I think I am going to keep that up as well. It's nice to have an album to flip through. Do any of you keep an album in addition to your blog?


Meanwhile, Steve was in the basement fine tuning those brackets and mixing up stain.

Having new people in our house makes me aware of how many things we still need to do, but I also felt really proud of what we have accomplished. Proud to be restoring and not tearing down and making the world more vanilla.

Everyone give yourself a pat on the back tonight- you deserve it.


Tuesday, May 17, 2005

Refinishing Maple Floors

I was reading Making a House a Home's blog today about the estimate they got for refinishing their wood floors and I decided to post our experience with this topic. I have encountered many people who say floor refinishing should be left to professionals. But when we got the estimate for our 10' x 11' kitchen for $1200.00, we decided that we'd try it ourselves. I am not going to debate whether that was right or wrong, but as many of you know budget has a powerful effect on what one might think they are capable of doing.

Steve did research on the Wood Flooring Association's website. He learned a number of things about how the job should be done. He also learned that many floors can be screened rather than sanded as long as they aren't heavily damaged. Every floor has about 3-4 sandings in it's lifetime, so it's worth it to sand conservatively and maintain your floors finish so they don't have to be re-sanded too often.

Here is what we ended up doing:
We rented U-Sand machine and an edger from our local hardware store. The U-Sand has 4 orbital disks on it and we started with approximately 20 grit and gradually went up to about 120. The benefit of the U-Sand as opposed to the drum sander is that it stays level-
you CANNOT gouge your floor with it-period.
The edger was another story, the thing kind of had a life of it's own -a powerful little machine and we had to be careful and most important: keep it level to avoid scrapes or gouges. Our floor had stain on it and we had no issues with burning as was mentioned in some comments on Making a House a Home's blog.

The floors came out pretty darn good I have to say. The only thing is we could have sanded it for longer to even out a few waves in the floor and we ended up with a few scrapes but they are not noticeable.
Here's the finished floor

One thing to note about this task is that you will have to fill all the cracks between the boards and holes with wood putty orsomething similar. Otherwise dirt will collect there. One thing I'd do differently next time is use maple wood filler for filling the cracks. We used wood putty and the match isn't as nice as it could be.
Here's a close up shot

Another thing to consider is the kind of finish you use. Most refinishers use water based finishes nowadays, which are much less toxic but not as strong as the old stuff. We used an industrial grade water based finish that we purchased from Woodworker's Supply. It was around $50.00 per gallon and we used 2 Gallons.

A Long View


To give you a time frame, it took us about 13 hours to fill the cracks and sand clean a 10' x 11' room- it was a long day. We had no idea it would take that long. It cost us about $400 between the tool rentals and sandpaper(we used alot of course) but that was less than the $1200 that we were quoted for that room alone.

We are planning to test out our floor refinishing skills on the den in the Fall if we gut the room as planned. I just thought I'd share our experience and hopefully it helps someone else out!

Saturday, May 14, 2005

Even our dogs are obessed

Everyone in this house loves "Houseblogs"

Mojo pondering the myriad of topics on the home page...


Billie checks whats new on Houseblogs with her morning cup of coffee.


I couldn't resist this one. Billie often sits behind me in our desk chair. I tend to sit on the edge of my seat and Billie likes to be near while I blog. I know there are alot of dog lovers (and cat lovers) out there, so hopefully this makes you smile on "work day."

Now on to sanding those brackets!

Friday, May 13, 2005

The call of the woodshop

I seeded the lawn tonight and last night I planted some Oriental Lilies from Dutch Gardens- my favorite bulb source thus far. They have the largest and most beautiful tulips I have seen.

Steve on the other hand just can't stop thinking about wood. He's at the woodshop right now as a matter of fact.

Photo was taken last weekend in Lake Geneva. Quite a big burl there. Also some very big homes, including the Wrigley Mansion.


That's me and my Mom in front of the Wrigley mansion.

And if you're ever up that way in Lake Geneva, WI and you want a nice higher priced dinner, Gilbert's is highly recommended. They use all organic and locally grown food. And on top of that the restaurant is in a HUGE old Victorian house looking out on Lake Geneva. It is really lovely.

Thursday, May 12, 2005

All in the details

Take this carved deer for example. This was Steve's nod to my more decorative nature.

Steve is planning to make all the furniture in our house , one piece at a time. He likes arts and crafts style furniture and initially I felt it would be just too much to have
entirely arts and crafts style furniture.

I have since changed my tune a bit- I have been "assimilated" since those early days.

He got the design from one of our picture books, In The Arts & Crafts Style.

One of the things I really love about the arts and crafts style and movement is the emphasis on simplicity and the quality. I like the whole idea of things being made to last and not to toss in the trash every few years- less landfills for one thing! And to top it off, it fits perfectly with our Chicago-style 2-flat!

Wednesday, May 11, 2005

It isn't always pretty

There are times when I lose patience...this is one of those times. Yes we have running water and a working dishwasher and things are cleaned way up, but the tile isn't done, the toe kicks aren't on, those damn doors aren't on because we lost the screws, and many more other "little" things.


Somehow it was easier for me to be patient when we had no walls and I was working my butt off every weekend to get to that point. I am really at my worst when there is nothing I can do and Steve is doing the bulk of the work. I become (to use the hated word)...a bit of a nag.

I just can't seem to help myself. I'll ask him the fated question, "What are we doing this weekend?" (Because, like I said finish carpentry work is Steve's expertise not mine and I therefore revert to "helper")

Steve rationally and coolly says, "Finish that small countertop area, sand the brackets, and raise the dishwasher. That's probably about it."

I think to myself with eyes bulging, "Oh-my-God-I-can't-take-much-more-of-this-waiting-on-minutae!!! Can't you work faster? Can't you do more? and faster please much faster!! We're never going to finish!"

I say to him knowing full well I am contributing to my own folly, "But what about the missing plynth blocks?"

"...and the missing toe kicks?"


"...and the missing tile...?"


It's at this point that Steve gets annoyed at me and I won't bore everyone with all the details, but it's no fun for him or me. You see, there's a reason why they say remodeling breaks up marriages. It gives you a chance to see your sig other at their worst and best.

Maybe I can sand the back door this weekend and feel like I am making some progress. That might help. I feel a little better after writing this post too.

Sunday, May 08, 2005

Happy Mother's Day

Happy Mother's Day to my Mom and all the renovating Mom's out there. Here's some flowers for you. Enjoy the beautiful day!

Mid-Late Tulips

Orange Emperor Tulips

Saturday, May 07, 2005

Woodshop Report: Brackets

We looked at various sources for shelving corbels - VanDykes, Woodworkers Supply and many others online. But we really did not see anything that caught our eye. Either they had too much elaborate carving or they looked pedestrian. Many corbels were very Victorian looking too, which does not match the character of our house. So we decided to design and make our own.


We chose quartersawn white oak because the figure of the grain is good and the rest of our casing and mouldings are oak. The stock is twelve quarter thick (1-3/4”) which we bought locally at WoodWorld here in Chicago. The inset panel has a beaded profile to mirror the cabinets and wainscotting in the kitchen. A measured drawing is available for anyone who would like to reproduce our design. We are constructing two shelves, each having four corbels. Total time to make eight brackets was 21 hours.

Next step we will sand smooth all pieces, stain then glue and screw them together. The inset panel is not glued and floats to accomodate movement of wood throughout the changing seasons. Then will make the shelves. We sourced heavy-duty mounting brackets for attaching them to the wall from Woodworkers Supply via mail order. The mounting brackets will allow each corbel to be removed during painting of wall. Check back soon to see how we attach brackets to the wall and see the finished project with shelving attached.

The Money Shots

Well, they aren't the real money shots yet, because we still aren't done, but since the natives have been getting restless :) - here they are. And now I can show my beloved sister in Connecticut our progress too! I am happy with the way things have gone so far. Take a look here at the before pictures if you haven't seen them before. I put them all into one post now for easier viewing.

West-facing window- end of "L"


Tiling won't be done until the brackets are in- we have to tile around them. Steve is at the woodshop working on them as I type. Also, the doors on the base cabinet are missing because we misplaced the screws for them. Still need to put in toe kicks.


We are getting a wrought iron grill for our exhaust fan.


Back door still to be sanded more and stained.


Beadboard wall and future home of plate rack
Eventually Steve will be making us a work table with a butcher block or marble top for this area. It will also serve as a little table for two. Notice our authentic restored bakelite phone from The Craftsman Connection. It has the rotary dial and the old style riiiiinnnnggg! I love it because I can hear it even when I am in the yard working.


Close Up of our own design stain glass window made by
Harmony Art Glass right here in Rogers Park.


Caulking the edges around the countertop and Farm Sink
Steve used a syringe he got from Woodworkers Supply. We usually use it for getting wood glue into nooks and cracks. Getting caulk thru it was tiresome but it will be pretty much invisibly waterprotected. This was done this morning.

I have been really sick since Thursday night and am just getting better now. I probably should be laying on the couch right now, but instead I am watering the trees and posting!

Mystery Wood

If anyone can tell from this photo, what kind of wood my back door is made of, I'd love to know. I am guessing either poplar or fir. The wood is way softer than oak. We need to replace on piece of moulding on it and I kind of want the wood to match because I am going to stain it rather than paint it.


Back door still to be sanded more and stained.


And if it helps, here is the other side, which has quite a different stain left on it.

Thursday, May 05, 2005

I'm a gonna, cause I canna!

Planted the cannas today. They are a great plant (bulb actually) if you don't mind having to dig them up in Fall and plant them again in late Spring after danger of frost is over. Since we are by the lake and the last frost date was estimated to be May 25th, it was time.

close up of canna bulb: note 3 headed Rhizome

The one problem with them if you can call it that, is that every year you end up with twice as many bulbs. I had 2 large landscape size bags last Fall and I was only able to plant half of them.

bags o' cannas

In fact, often people get cannas as gifts for that very reason. That's how we got ours and now we are the givers. And what a gift it is. As with many other things, they are worth the extra trouble.
I have found that they do best in Full sun and they like some fertilizer for better flowering-Miracle Grow worked wonders last year. They don't start flowering till around August, but they constantly flower thru the first frost and then the foilage dies almost immediately. Then I go outside in my fleece jacket and have a nice autumn garden day digging them up and storing them for the winter in a cool but not freezing room (Think basement not unheated garage).

planting the bed

They need to be kept somewhat moist so they don't dry out. For the past few years I have stored them in a large landscape bag with some peat moss, sprinkling water over them and then they were fine all winter. I check them every month or so to make sure they aren't dried out.

They are best in the back of a bed because they get up to 6 feet tall and butterflies like 'em too!

Of course Mojo had to help too- he likes chewing on bulbs and in this case I had a few to spare.

"Hmm...this smells interesting..."